Crafts

Personalized Stamped Books


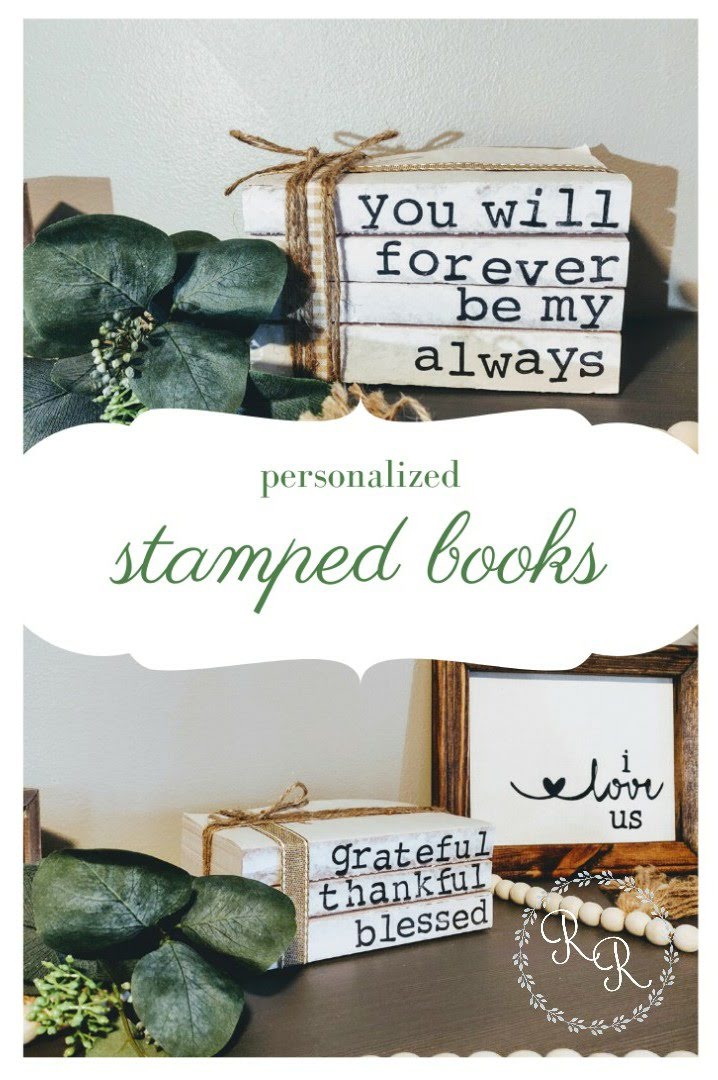
One of my new favorite things to make are these personalized stamped book sets! These are easy to make and fit so well with the Farmhouse vibe I love. I have made several sets for myself and also for family! There are several ways to make these, using hard bound books and painting the covers & binding, removing the binding & covers and then painting, or probably my favorite: removing the binding and covers and leaving the natural pages showing. The natural way tends to lean a little more towards the vintage/rustic vibe.

To make, simply pick the look you are going for, stamp your desired words and finish off with some twine and/or ribbon and greenery. I like to make the letters a little off, I am a fan of the perfectly imperfect look they have. Using old books means you will have some definite character to the sides and also to the binding, just make sure your binding isn’t dented in, it makes it difficult to stamp even if you remove the cover.

Mine and my husband’s names and wedding anniversary, I love the light and dark of the ink and imperfectness of this, it adds to the vintage/rustic feel.
This stack is painted, I painted all of the book, but you could just do the area to be stamped. I didn’t sand away the glue from the cover, I think it adds character. This set is going to my mom and dad, all their grandkids names.

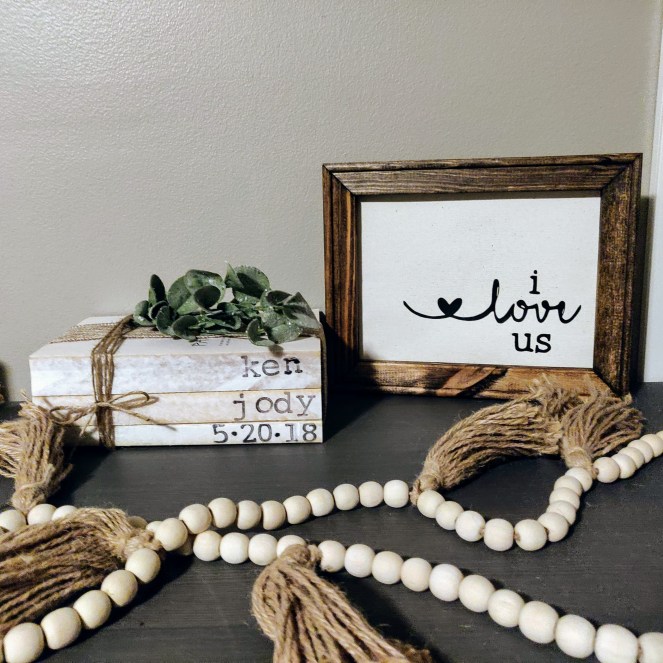
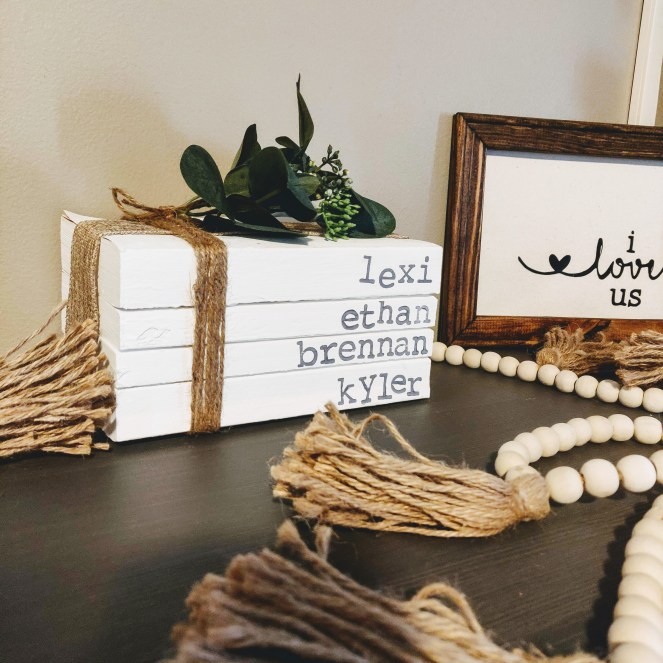
The options are endless for what you can make and they make awesome personalized gifts! A custom stack with name, date of birth and weight is a perfect gift to welcome a new baby. Add bride’s name, groom’s name and wedding date for a wonderful wedding or anniversary gift. A stack of children or grandkids names for a meaningful Mother’s Day gift. A simple quote for a friend’s birthday or just to put a smile on their face.

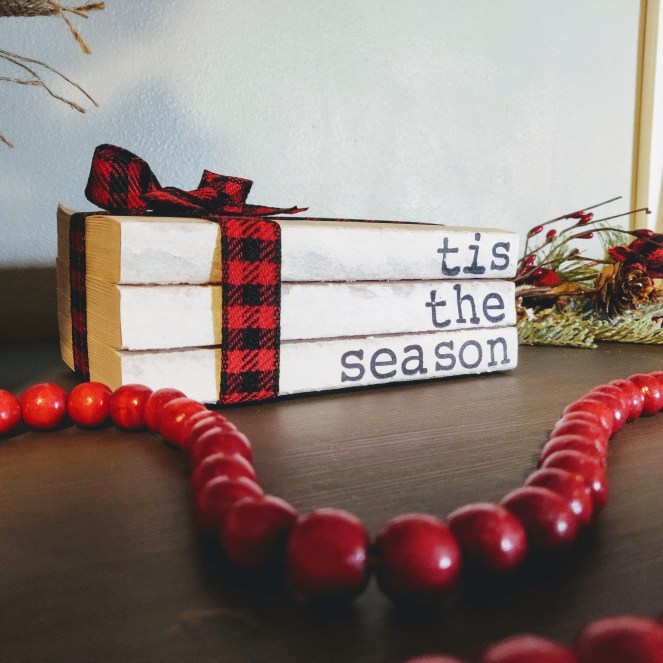
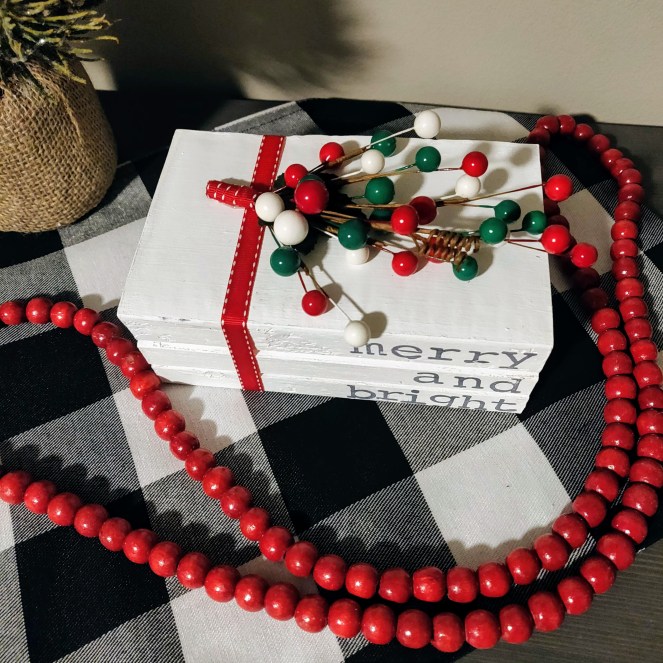
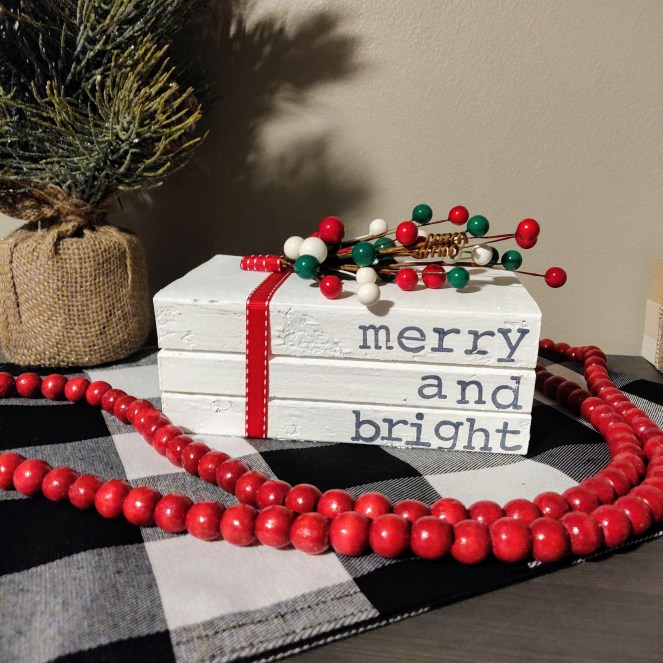
As you can see I also made some with some Christmas cheer. You can have a set for each of the holidays. Have fun with it and be creative! If you don’t have the time or just aren’t a lover of crafting yourself, you can head on over to my Etsy shop to personalize your own stack of custom stamped books handmade by me!

Follow me on Facebook and Pinterest to check our more crafts and DIY projects!


Crafts

Monogrammed Pumpkin

Who doesn’t love fall? Beautiful weather, the leaves changing colors, bonfires, wearing jeans & sweaters and of course pumkins! I don’t even drink pumpkin spice lattes and I love it! I decided to do a little fall craft to get a jump on my front porch decorating this year since I have a nice covered front porch now.

I have a Cricut, but if you have artistic ability (which I don’t), you could paint your pumpkin. I took the easy way out and did vinyl. The pumpkin is a 9 inch craft pumpkin from Michaels, I found mine on sale for $8 (regular price $20). I purchased 2 sheets of 651 vinyl (also from Michaels) in Navy and Gold. I had the ribbon on hand, it was in the clearance section at Hobby Lobby and I can’t pass up on clearance, burlap or ribbons, so all 3 combined and it was a definite purchase!

Craft pumpkin and 651 vinyl from Michaels

I cut my big T first, I went with 6 inches tall and used Mellow Soldier font which came in a free font bundle on thehungryjpeg.com. I wish I would have chosen a font with a straight bottom on the T, this font angles it so I feel like in some of my pics it looks crooked, I’m a little too critical sometimes. When applying to the pumpkin I tried to choose the side that was flatter than the others so it would be less likely to bubble or wrinkle.

Next step was the Thomas. I will confess the longest part of most of my Cricut projects is deciding on a font. I didn’t have any I was really in love with, so I went and found some new ones to pick from, which added to the length of time I spent on this project. For some reason the letter T just isn’t pretty in all fonts, some it looks like an F, others it looks like a J…it’s the too critical side of me again. So after checking out fontbundles.net and many free fonts later I found the Christina font. I made this 6 inches wide and about an inch and a half tall.

When applying the Thomas I would love to say that I have a perfect way to put it on, but in all honesty I had to cut it twice because the first one I thought looked crooked and it got ripped when trying to adjust it. I usually just eyeball these things, no real good way to measure an uneven pumpkin surface. I started by finding the middle of Thomas and I put that section on first and worked to one side and then the other. It may not be completely straight but it’s pretty close!

Last but certainly not least it needed a little something extra. Bows make everything complete! I went with the burlap ribbon with gold polka dots to tie in my gold lettering. To make the bow I followed a diy from Mommy Suite. I adjusted the measurements for my bow to better match the size of my pumpkin. I cut 2-12 inch long lengths, one 9 inch long and a 3 inch long piece for the center. It is a pretty easy bow to make and honestly would probably be easier in the bigger size and with a wider ribbon…it would also help if I didn’t burn my fingers on the hot glue! Once the bow was complete I simply hot glued it to the top of the pumpkin and ta da!

This morning my cute pumpkin got to be added to the front porch bench where she will have to patiently await her fellow fall decorations…will show you the finished porch…hopefully before Christmas!

These are super fun to make and are a great fall gift!