Decorating · DIY

Shiplap Headboard

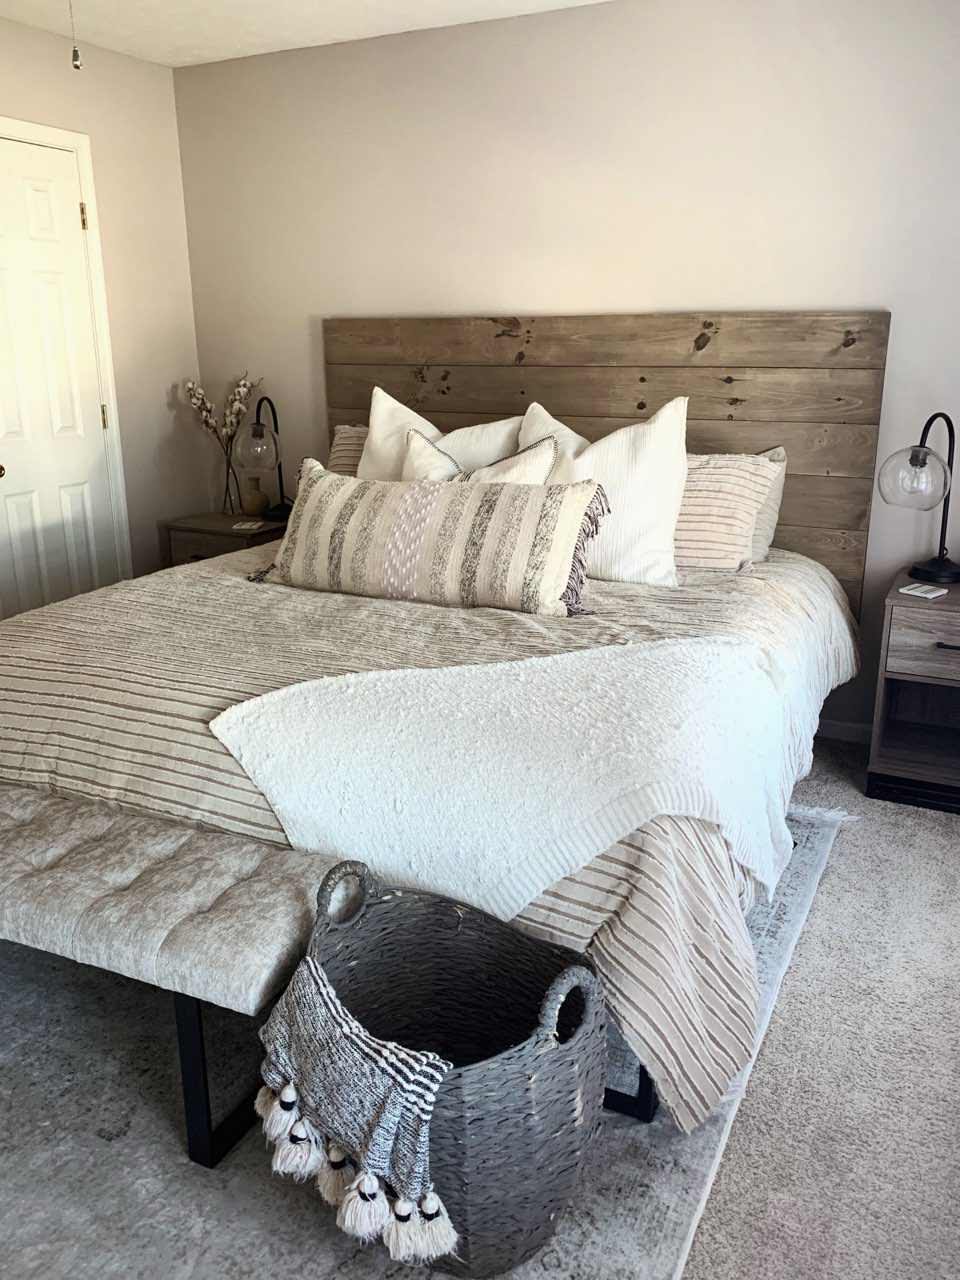
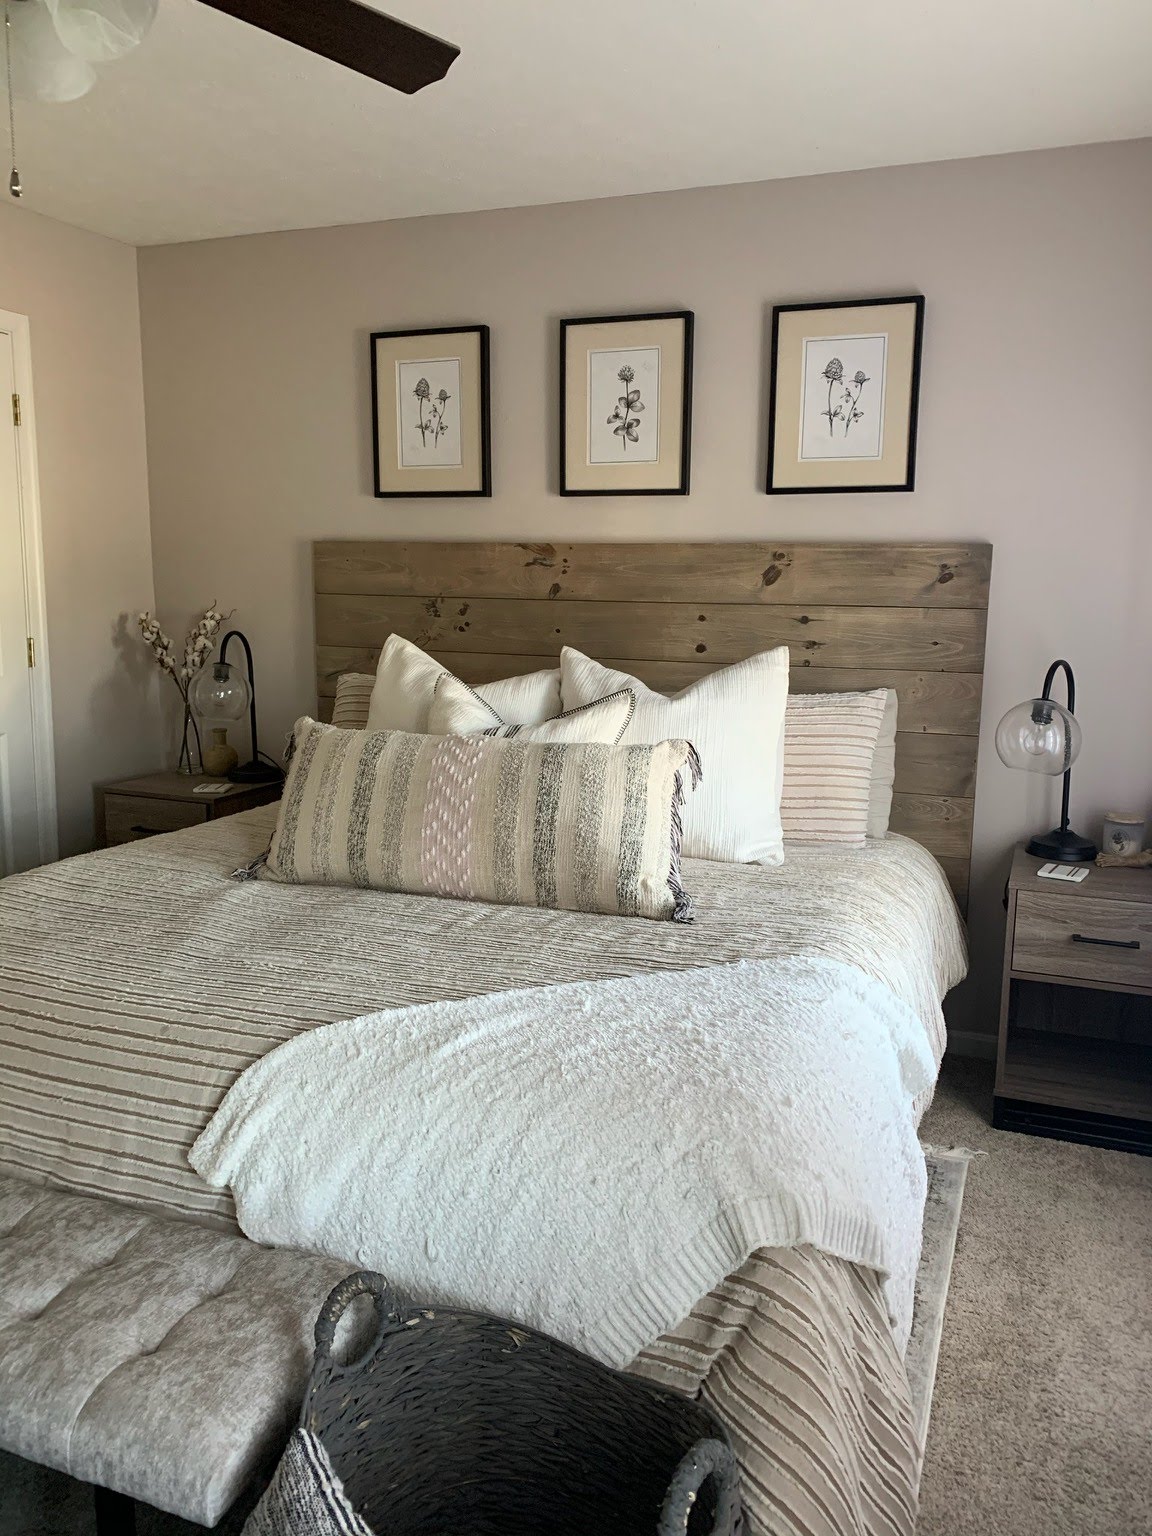
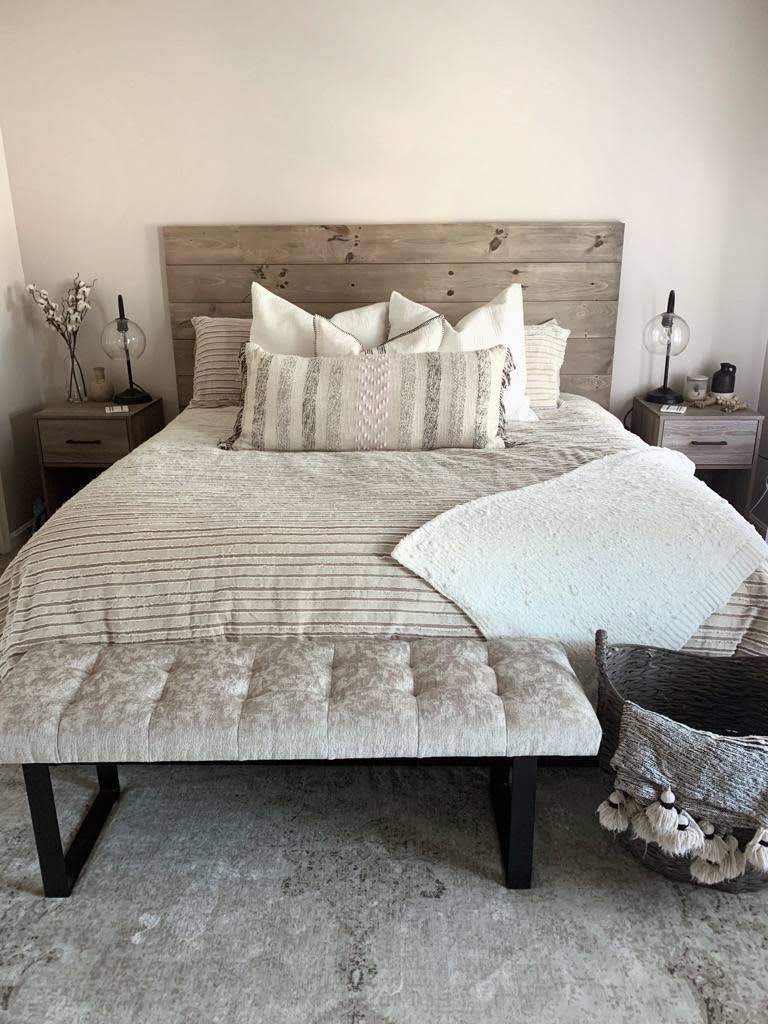
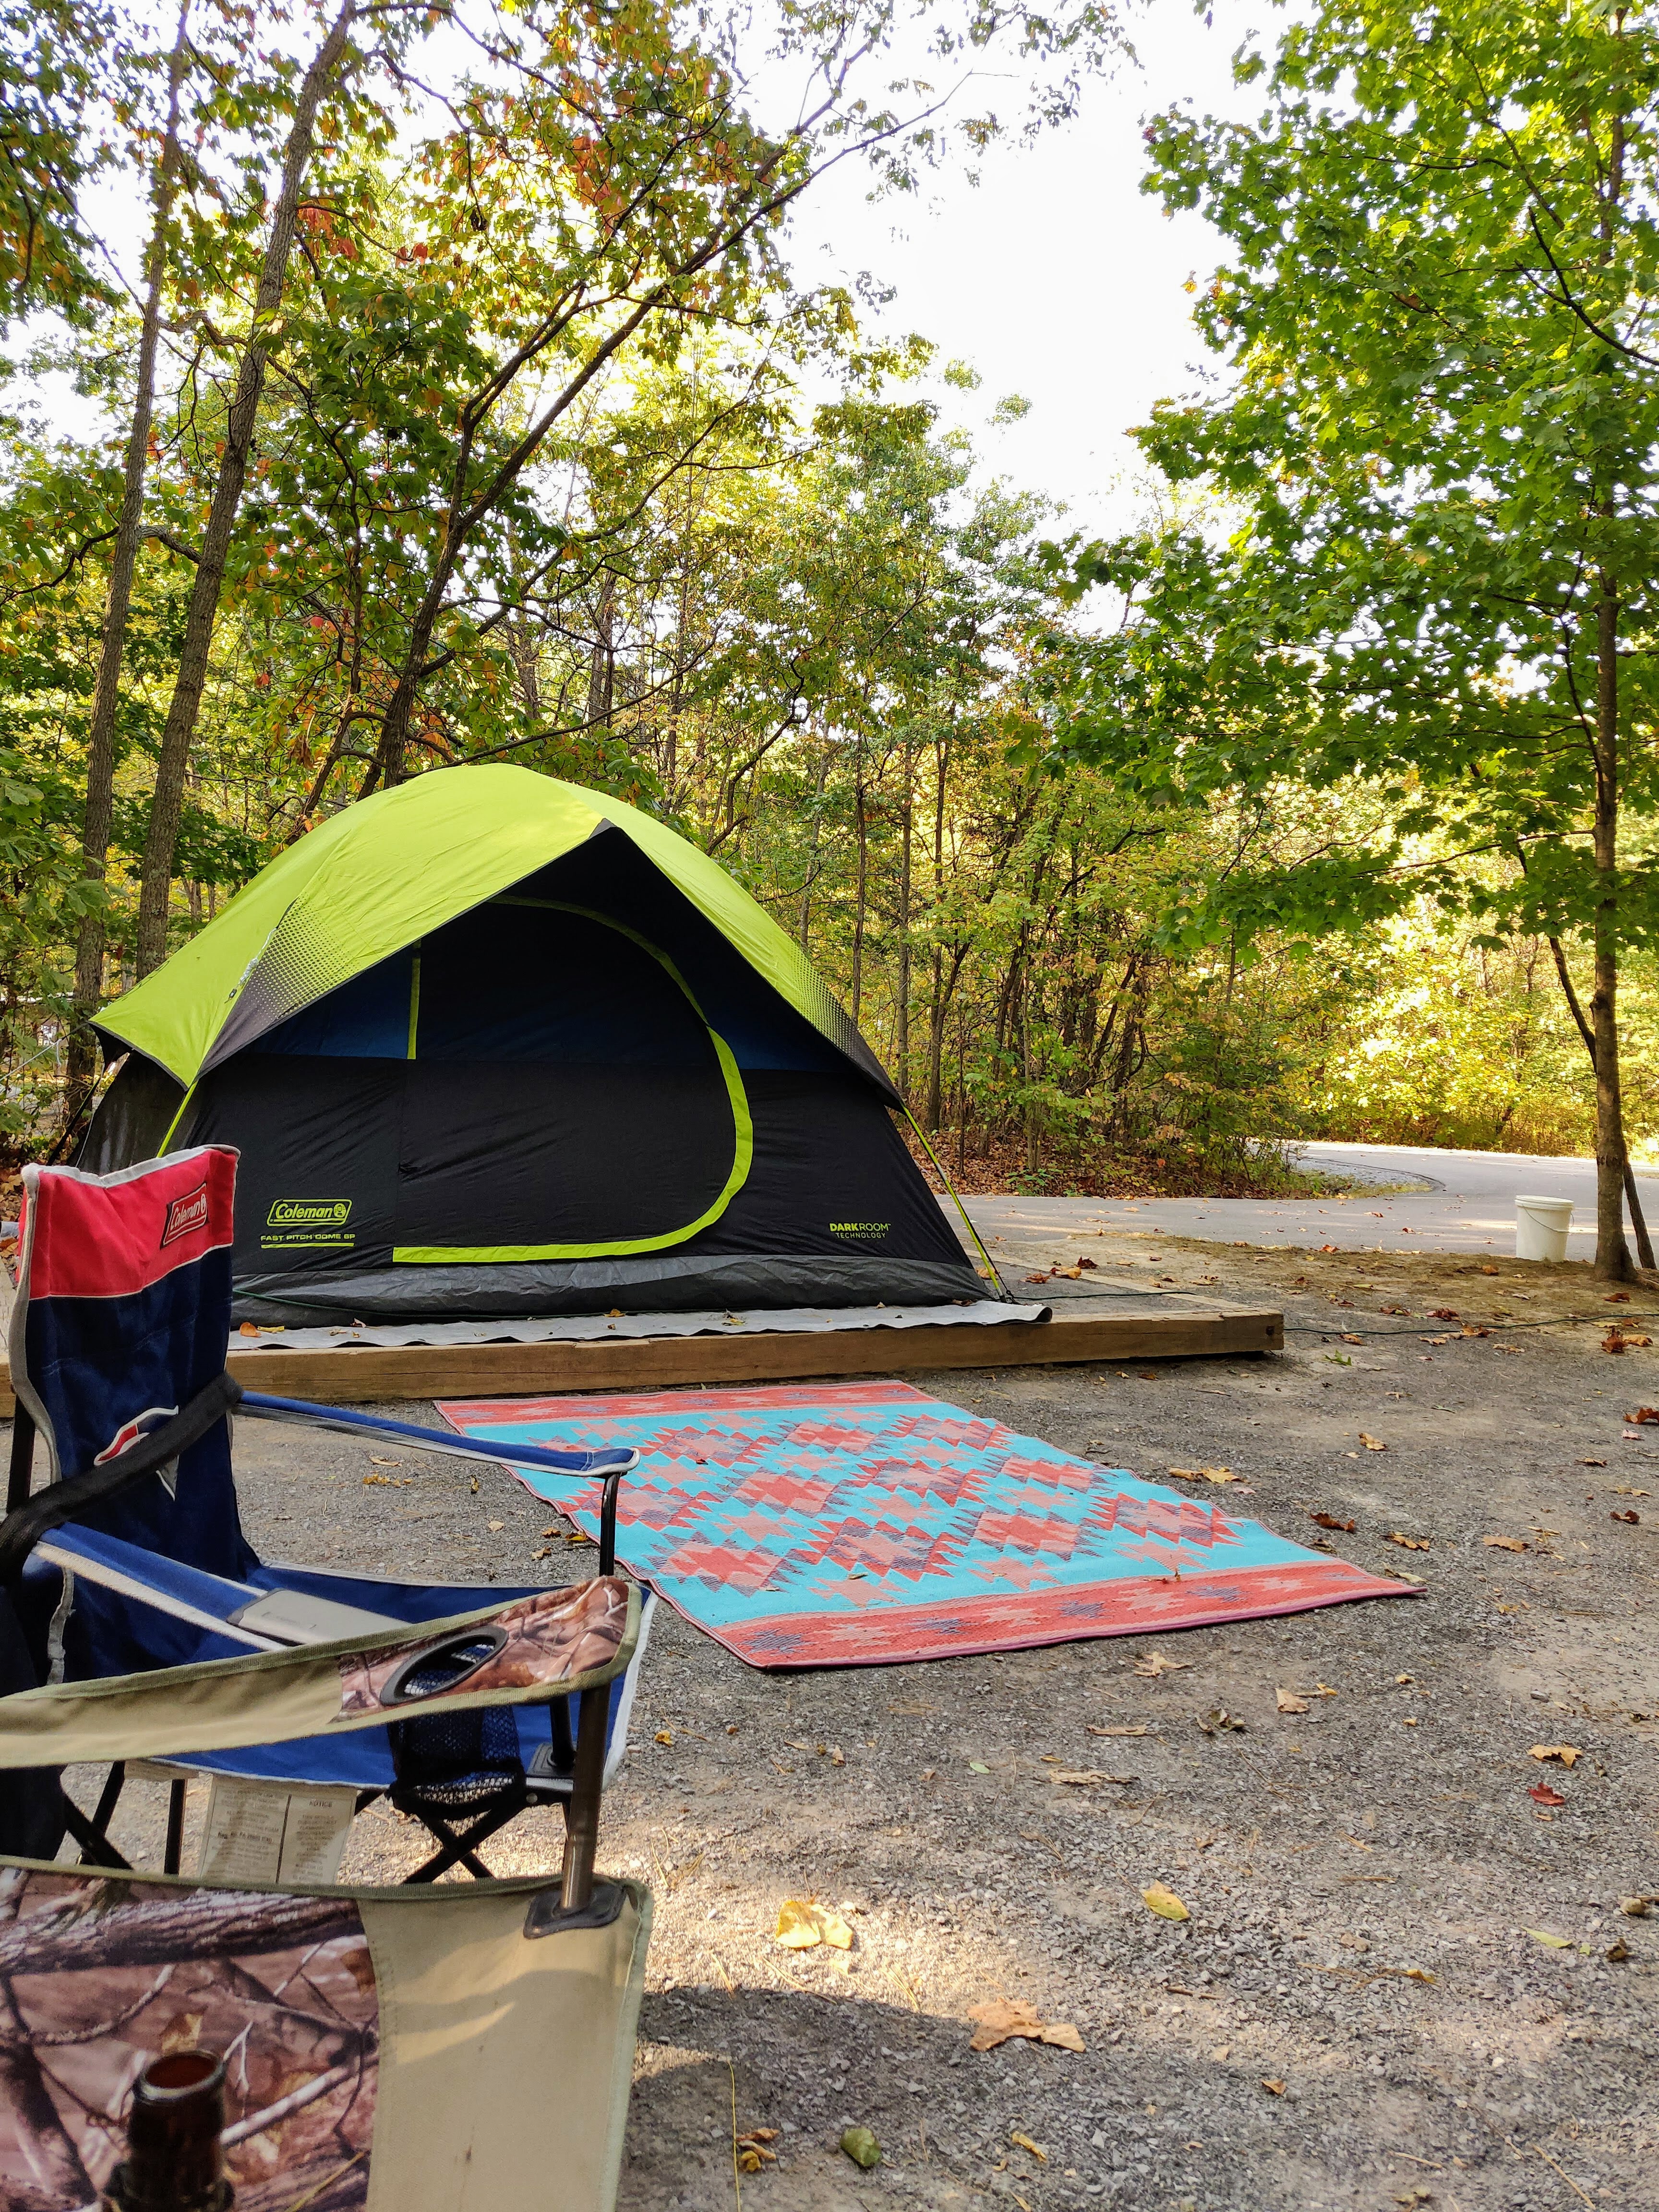
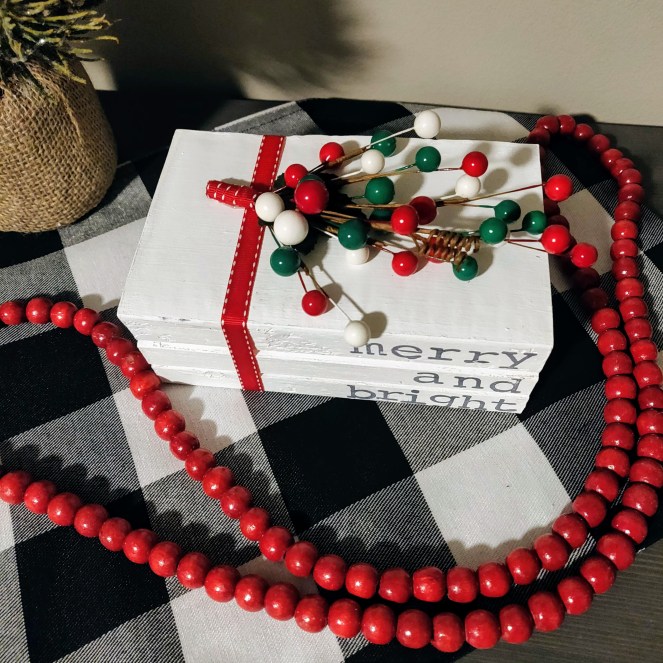
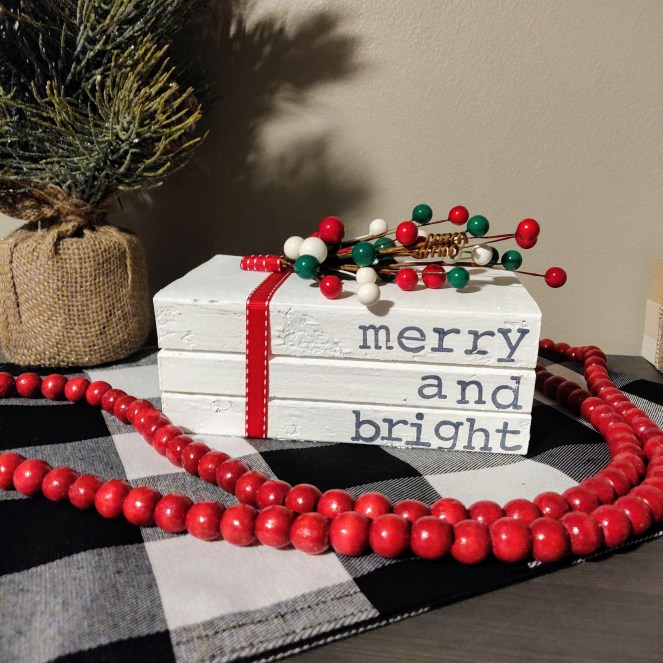
My daughter and her boyfriend have been redecorating their bedroom…well she’s redecorating, he’s just a great guy that knows making her happy is important, we love him for this! In her quest to redecorate she had been struggling to find a new bed that matched her boho/farmhouse style and would also match the dressers and nightstands she had already purchased. She was wanting something big enough to accommodate their king size bed but not too big that she couldn’t showcase artwork above the bed. So mom and stepdad to the rescue! We told them we had no problem making it for them…but they had to help out!

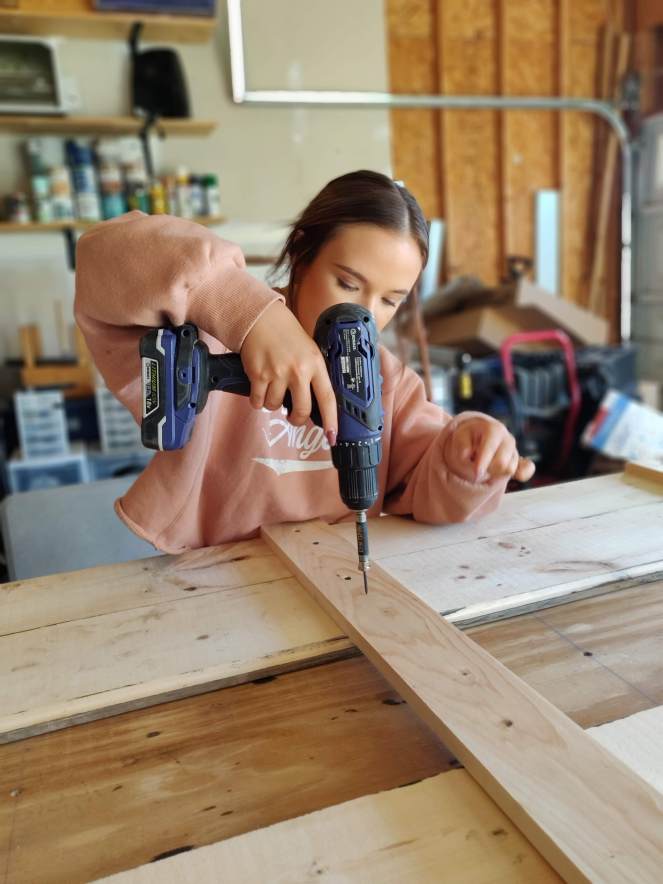
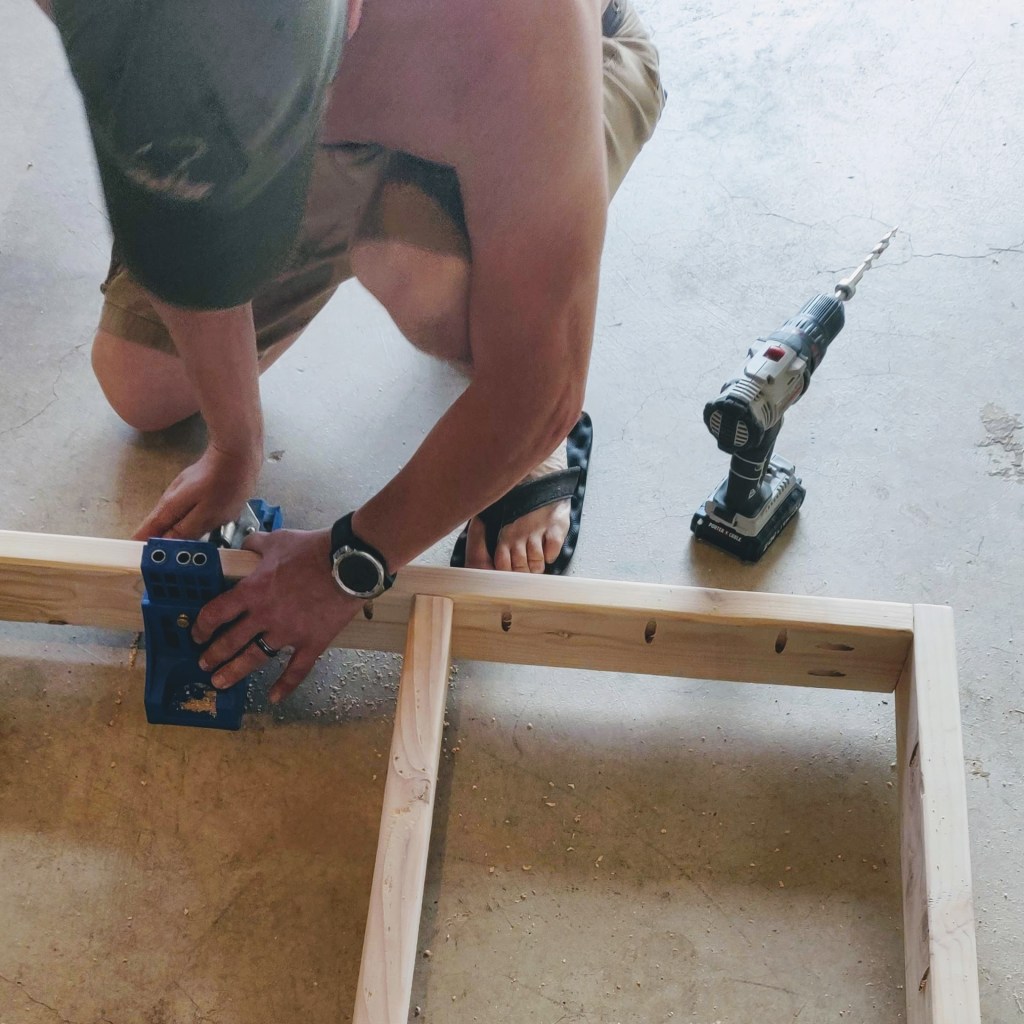
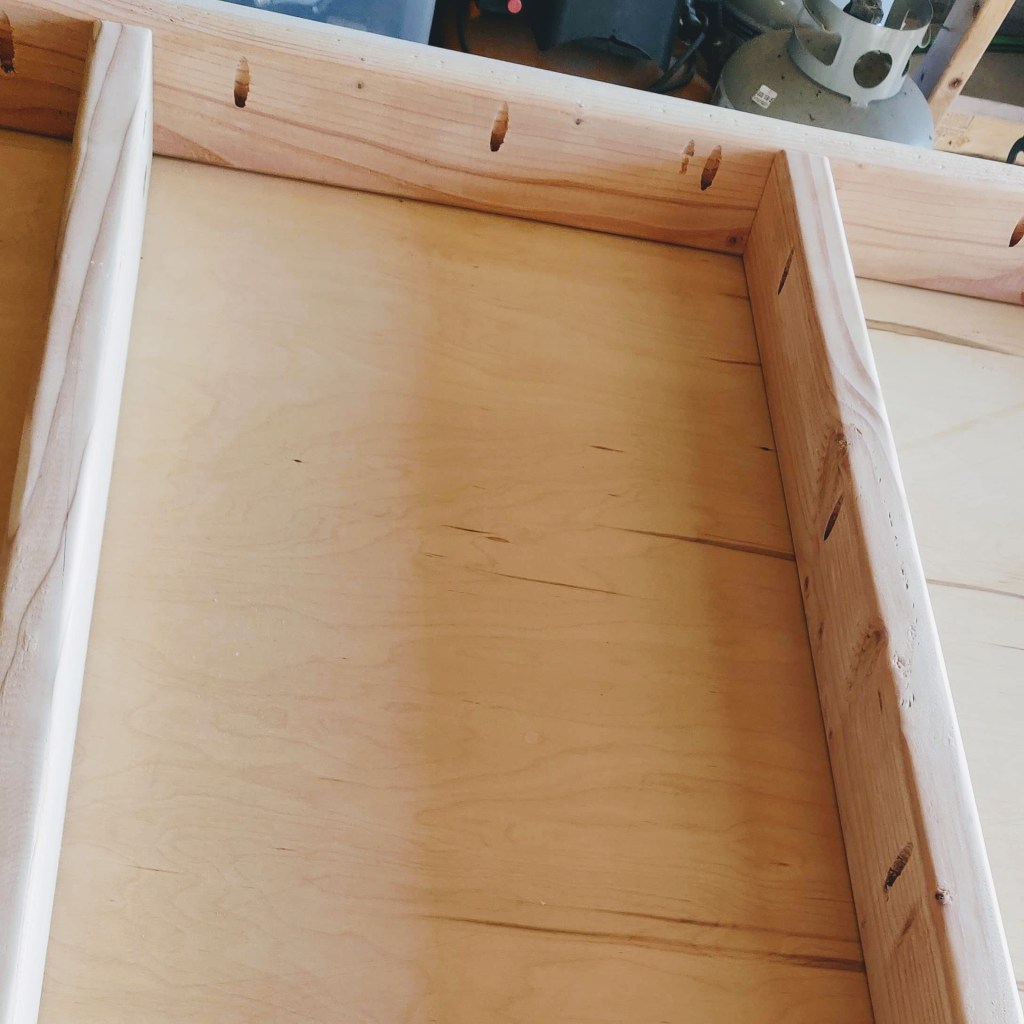
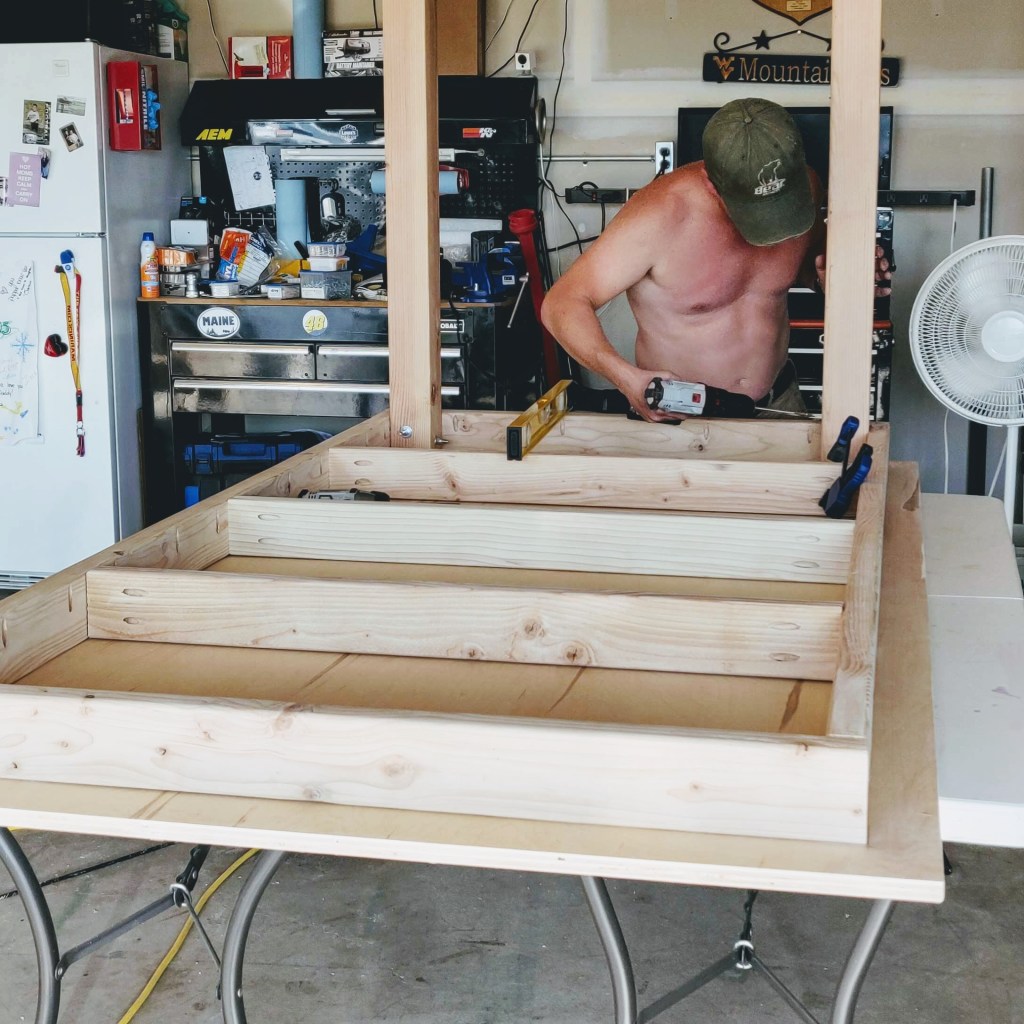
We decided to make the headboard using pine 8 inch shiplap and pine 1 x 4’s. We cut the shiplap to the length she wanted (84 1/2 inches) this size would give them about 4 1/2 inches of overhang on each side. Then for height she wanted approximately 4 feet up from the top of her bed frame, due to the width of the shiplap and wanting to keep all of the boards the same we ended up being between 47 and 48 inches tall which still worked out perfectly. As you can see we put them to work! They both got to use the miter saw for the first time, which is always a fun experience! Not shown are pics of the staining trial and errors, trying to match a non wood surface was not easy, but we got as close as we could! We stained all of the boards before assembling using an Antique White base stain and Jacobean stain on top with several coats. We attached the shiplap to the 1 x 4’s from the back so there wouldn’t be any screw holes to fill.

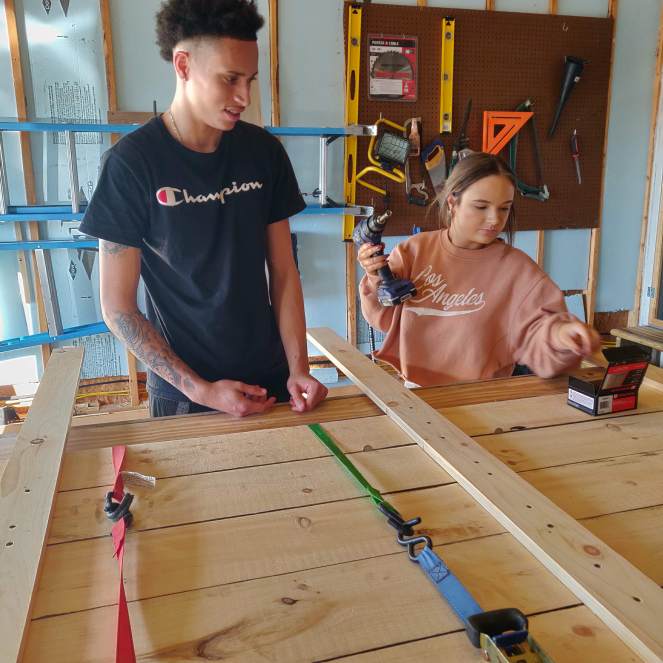
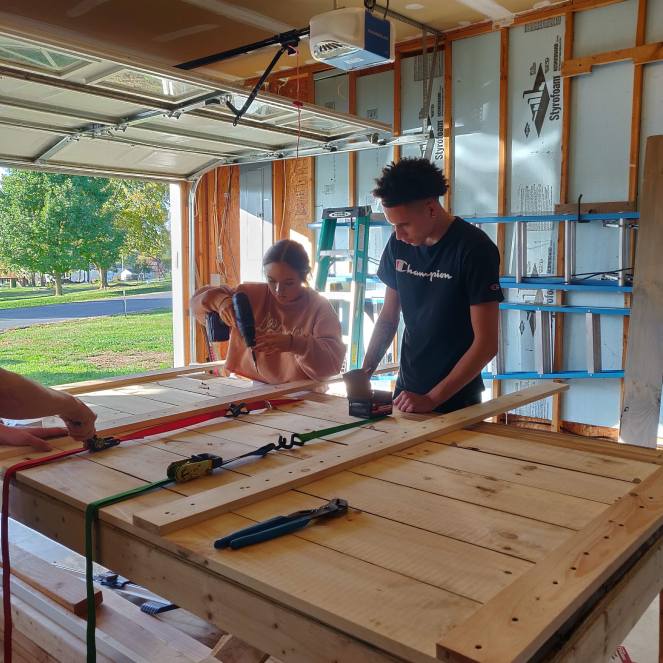
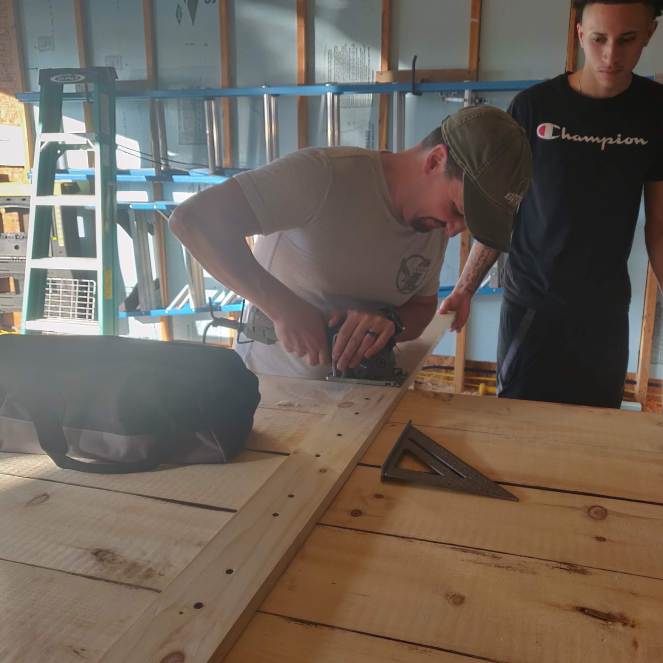
As you can see in the picture we had some boards that didn’t want to go together like we wanted them to… so out came the ratchet straps…we have since bought some large clamps to do the job in the future. We used nickels to create the “nickel” gap in the shiplap. After the shiplap boards were attached to the 1 x 4’s we cut off the excess board at the bottom with our Rockwell saw…definitely a great investment, it works perfectly for smaller cuts! To hang this on the wall we used a metal french cleat with a weight limit of 300 pounds, more than enough to properly secure it to the wall. We ended up adding another piece of wood to the center on the back to attach the french cleat to. We had a lot of fun doing this project with them and we are so happy they love how it came out!

Decorating

Front Porch Decorating for Fall

I LOVE Fall!!! Love it so much I wish we could just keep it around until Spring! My nice way of saying Winter is NOT my thing! I have been wanting to decorate my front porch for fall since we bought our house a year ago. With us moving in at the beginning of October last year and gutting the kitchen within the first 2 weeks of us being there, porch decorations were not at the top of my to do list. I am bummed I missed out last year so I decided to get some inspiration for what I wanted to do with my porch this year by turning to some fellow bloggers. Here I will share some of my absolute favorites, my porch will never look as amazing as theirs but it gives me something to aspire to!

The Dainty Darling

I love her pumpkins! The different colors, sizes and irregular shapes look so cute mixed with the cornstalks and hello Fall Sign.


Modern Glam

Doesn’t her porch look so cozy and inviting at night?! I love how she mixed in candles and string lights to give a nice warm ambiance to her beautiful front porch.


Sunny Side Up

I really like this simple Halloween look that Erin came up with! This would be a great compromise for me and my hubby, he loves to decorate for Halloween…I’m more into everything Fall! (Also am in love with her front door!!!)


Vintage Home Love

I really like the mix of old crates and burlap wrapped pots she used for her mums. AND the striped porch floor!!! I know it isn’t just for fall, but I LOVE it!!


Liz Marie Blog

Pumpkins, pumpkins and more pumpkins! What’s not to love about this front porch? I am really liking the boxes she used at the top of the stairs as well, what a great find and perfect for front porch decor!!


Taryn Whiteaker

The neutral color palette of Taryn’s porch is such a change from all the oranges, golds and reds of fall, but I really love what she did with it! The wreath she made for the front door and the pallet sign are simply adorable and I love the color of her front door!


Hope you have found some inspiration for your Fall front porch and hopefully I can get my butt in gear and get mine decorated before it’s time to break out the Christmas decor! Follow me on Pinterest to see more inspiration for your home!

Travel

Seneca Rocks, West Virginia

My husband and I spent last weekend exploring Wild and Wonderful West Virginia. We had not gone camping at all this year and when plans with my parents fell through for our annual fall camping trip we went searching to find a cool place to go on our own. Through our searching we came across Seneca Shadows Campground in the beautiful area of Seneca Rocks, West Virginia. Neither of us had ever been to the area, even though both of us have lived within a couple hours of it for over 10 years. To say it is a beautiful area is an understatement!

The pics above are of our campsite at Seneca Shadows. We got the last site they had with electrical hookup. We honestly wouldn’t need electric if it weren’t for my husband’s coffee and fan while sleeping addictions, but we were worried it might get too cold at night and the heater was packed just in case. While we loved the site, it wasn’t ideal. It is a double site, so 2 tent pads and 2 electrical hook-ups…and double the price. The letdowns were that the electric is nowhere near the tent pads and there is a small bridge to get to the tent pads that was almost impossible to get the truck over…notice I said almost because of course my hubby made it his mission to get the truck over the bridge…it took several tries. We did love the privacy of the site and that we only had one site next to us, the rest was beautiful woods.

The leaves were just starting to change color and the weather was absolutely perfect for camping, warm during the day and cool enough at night to enjoy a campfire. Both nights we were there we were blown away by how many stars there were, even tucked away in the trees we could see thousands of stars. We did manage to miss packing a few essential items which we will not forget in the future…but we made due with some pliers for tongs. We also took a 40 minute trip to the nearest town for an extra extension cord, only because we didn’t want to pay the exorbitant $56 for an extension cord at the closest market Yokum’s, price gouging at it’s finest. I definitely would not buy anything there, instead there is another quaint gas station/market Macksville Mart, it is actually closer to the campground and no price gouging!


We spent a day exploring Spruce Knob and Spuce Knob Lake as well as a fun adventure just traveling the back roads to and from. Will talk about those in another post…they were spectacular! On the last day that we were there we went over to explore at the Discovery Center at Seneca Rocks. We took some pictures but decided to save the hike to the top for another day since we were wanting to go check out Dolly Sods before heading home. The Discovery Center is pretty neat and I am sure the view from the top of the hike is amazing! We had a wonderful weekend camping and enjoying all that nature has to offer and are looking forward to more amazing camping trips in our future! Share some of your favorite camping/nature destinations in the comments below, we are always looking for new places to explore!

DIY

Craft Table

I don’t know what my husband has against Ikea, other than my inability to come out with just the things I went in to purchase, but when I told him I was going to Ikea to get a table/desk for my craft space he had another idea. We can build one ourselves! While I am usually okay with making things ourselves, I’ve wanted a craft table for awhile now and I didn’t want to have to wait any longer to get one. With both of us working full time we aren’t the greatest at starting and finishing projects in a timely manner…this ended up being one of those projects, but it was worth the wait!

I started out by drawing my design and figuring out how much lumber I would need. My original design had a more detailed base, mostly because we thought we would need it for support, we ended up nixing it when we saw how sturdy it was. We bought the 2×4’s and 4×4’s at Lowe’s and got the birch plywood for the top at Home Depot because they had better selection and prices. I chose to go with a counter height for my table so it is easier to stand and work at. I picked up some barstools at a yard sale but they need to be stripped and refinished…yet another project to work on.

To begin we made the underside of the table top. This was made out of 2×4’s and screwed together using our Kreg Jig K4 pocket hole system. If you do not own one of these and do any kind of woodworking I highly recommend you purchase one, it is an amazing tool to have! I love the look of not having any screws showing, makes our projects look more professional.

Lots and lots of pocket holes later we are ready to attach the tabletop. The other benefit to pocket holes is the overall strength they provide to your project. That tabletop isn’t moving…ever!

Now onto the legs! Once we decided to nix the more detailed base we decided on lag bolts to attach the legs, these would further strengthen the table and be able to hold the weight of the tabletop…which is super heavy! To attach the lag bolts, 2 holes needed to be drilled in each corner, making sure to offset so the bolts could go straight through without hitting each other.

I wasn’t happy with the look of the plywood edges of the tabletop. After looking at Lowe’s and Home Depot I finally found some window trim at Home Depot that was both affordable and the size I needed without being too detailed. We cut the trim to fit the sides, mitering the corners to create a nice clean finish. After the trim was on we went back and filled all the nail holes and the seam where the trim met the table with wood putty. Several sanding passes later she was ready to be stained.

I went with a dark stain on the top. I applied one coat then sanded it down and applied 2 additional coats to get to the desired shade I wanted. Then I decided to paint the legs and the base of the tabletop, I went with a bluish-gray color and I love how it turned out!

This project was done over several weekends and although it took us longer than I was hoping it would it was definitely worth the wait! It will definitely get lots of use and will hold up for a very long time and bonus… it only cost about $100!

Crafts

Monogrammed Pumpkin

Who doesn’t love fall? Beautiful weather, the leaves changing colors, bonfires, wearing jeans & sweaters and of course pumkins! I don’t even drink pumpkin spice lattes and I love it! I decided to do a little fall craft to get a jump on my front porch decorating this year since I have a nice covered front porch now.

I have a Cricut, but if you have artistic ability (which I don’t), you could paint your pumpkin. I took the easy way out and did vinyl. The pumpkin is a 9 inch craft pumpkin from Michaels, I found mine on sale for $8 (regular price $20). I purchased 2 sheets of 651 vinyl (also from Michaels) in Navy and Gold. I had the ribbon on hand, it was in the clearance section at Hobby Lobby and I can’t pass up on clearance, burlap or ribbons, so all 3 combined and it was a definite purchase!

Craft pumpkin and 651 vinyl from Michaels

I cut my big T first, I went with 6 inches tall and used Mellow Soldier font which came in a free font bundle on thehungryjpeg.com. I wish I would have chosen a font with a straight bottom on the T, this font angles it so I feel like in some of my pics it looks crooked, I’m a little too critical sometimes. When applying to the pumpkin I tried to choose the side that was flatter than the others so it would be less likely to bubble or wrinkle.

Next step was the Thomas. I will confess the longest part of most of my Cricut projects is deciding on a font. I didn’t have any I was really in love with, so I went and found some new ones to pick from, which added to the length of time I spent on this project. For some reason the letter T just isn’t pretty in all fonts, some it looks like an F, others it looks like a J…it’s the too critical side of me again. So after checking out fontbundles.net and many free fonts later I found the Christina font. I made this 6 inches wide and about an inch and a half tall.

When applying the Thomas I would love to say that I have a perfect way to put it on, but in all honesty I had to cut it twice because the first one I thought looked crooked and it got ripped when trying to adjust it. I usually just eyeball these things, no real good way to measure an uneven pumpkin surface. I started by finding the middle of Thomas and I put that section on first and worked to one side and then the other. It may not be completely straight but it’s pretty close!

Last but certainly not least it needed a little something extra. Bows make everything complete! I went with the burlap ribbon with gold polka dots to tie in my gold lettering. To make the bow I followed a diy from Mommy Suite. I adjusted the measurements for my bow to better match the size of my pumpkin. I cut 2-12 inch long lengths, one 9 inch long and a 3 inch long piece for the center. It is a pretty easy bow to make and honestly would probably be easier in the bigger size and with a wider ribbon…it would also help if I didn’t burn my fingers on the hot glue! Once the bow was complete I simply hot glued it to the top of the pumpkin and ta da!

This morning my cute pumpkin got to be added to the front porch bench where she will have to patiently await her fellow fall decorations…will show you the finished porch…hopefully before Christmas!

These are super fun to make and are a great fall gift!
Other

My First Blog Post

Wow! I can’t believe I’m actually doing it! I have thought about it, dreamed about it, prayed about it and now here it is! I have a blog…well the start of one at least. I hope you will stick with me as I struggle to get the hang of this website stuff. One of those high school computer classes probably would have come in handy right about now, I definitely don’t understand HTML and widgets yet.

So you might be wondering, or maybe not but let’s pretend you were, why did Jody start a blog? Well my amazing hubby and I love to spend our free time building, crafting, renovating and decorating and we want to share our projects with others. I am also hoping that sharing our creations will inspire us to do more. We bought our first home together last year and have begun renovating it to give it that Refreshingly Rustic style we love. We have a tendency to procrastinate on some things, so maybe having a blog will encourage us to get things done!

While the main focus of our blog will be our DIY projects and crafts, we will also share some of the fun we have exploring new places and traveling. We can’t resist the chance to check out a good winery or brewery and we love the outdoors. We have spent the last few years building a life together and would love to share our journey with you! Thanks for taking the time to read this, if you didn’t I’m still going to pretend you did! Subscribe below to get notified when I post new updates. If you have any ideas for projects you want to see on here email us at refreshinglyrustic@gmail.com

Crafts

Personalized Stamped Books


One of my new favorite things to make are these personalized stamped book sets! These are easy to make and fit so well with the Farmhouse vibe I love. I have made several sets for myself and also for family! There are several ways to make these, using hard bound books and painting the covers & binding, removing the binding & covers and then painting, or probably my favorite: removing the binding and covers and leaving the natural pages showing. The natural way tends to lean a little more towards the vintage/rustic vibe.

To make, simply pick the look you are going for, stamp your desired words and finish off with some twine and/or ribbon and greenery. I like to make the letters a little off, I am a fan of the perfectly imperfect look they have. Using old books means you will have some definite character to the sides and also to the binding, just make sure your binding isn’t dented in, it makes it difficult to stamp even if you remove the cover.

Mine and my husband’s names and wedding anniversary, I love the light and dark of the ink and imperfectness of this, it adds to the vintage/rustic feel.
This stack is painted, I painted all of the book, but you could just do the area to be stamped. I didn’t sand away the glue from the cover, I think it adds character. This set is going to my mom and dad, all their grandkids names.

The options are endless for what you can make and they make awesome personalized gifts! A custom stack with name, date of birth and weight is a perfect gift to welcome a new baby. Add bride’s name, groom’s name and wedding date for a wonderful wedding or anniversary gift. A stack of children or grandkids names for a meaningful Mother’s Day gift. A simple quote for a friend’s birthday or just to put a smile on their face.

As you can see I also made some with some Christmas cheer. You can have a set for each of the holidays. Have fun with it and be creative! If you don’t have the time or just aren’t a lover of crafting yourself, you can head on over to my Etsy shop to personalize your own stack of custom stamped books handmade by me!

Follow me on Facebook and Pinterest to check our more crafts and DIY projects!