Decorating

Front Porch Decorating for Fall

I LOVE Fall!!! Love it so much I wish we could just keep it around until Spring! My nice way of saying Winter is NOT my thing! I have been wanting to decorate my front porch for fall since we bought our house a year ago. With us moving in at the beginning of October last year and gutting the kitchen within the first 2 weeks of us being there, porch decorations were not at the top of my to do list. I am bummed I missed out last year so I decided to get some inspiration for what I wanted to do with my porch this year by turning to some fellow bloggers. Here I will share some of my absolute favorites, my porch will never look as amazing as theirs but it gives me something to aspire to!

The Dainty Darling

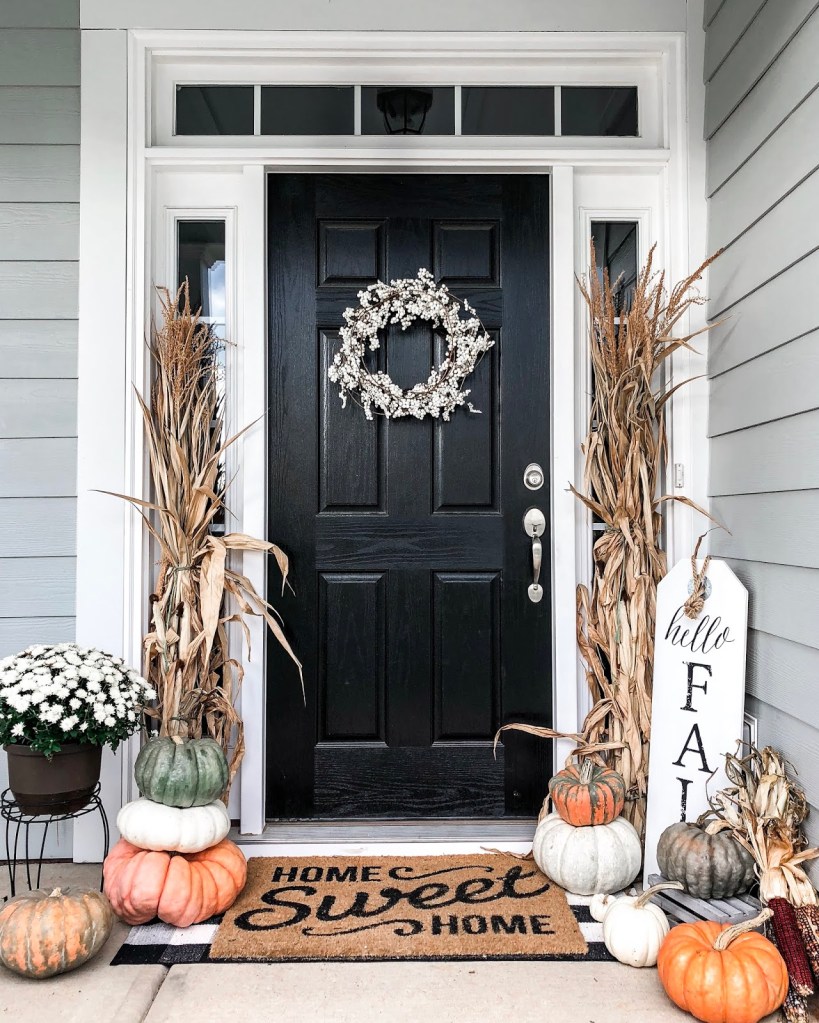
I love her pumpkins! The different colors, sizes and irregular shapes look so cute mixed with the cornstalks and hello Fall Sign.


Modern Glam

Doesn’t her porch look so cozy and inviting at night?! I love how she mixed in candles and string lights to give a nice warm ambiance to her beautiful front porch.


Sunny Side Up

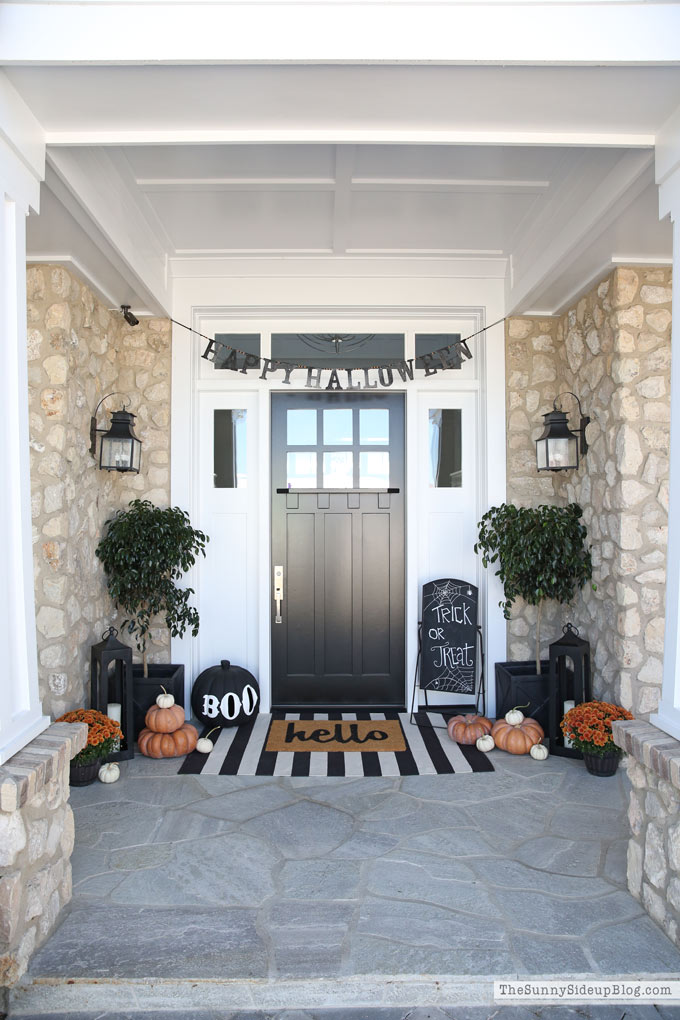
I really like this simple Halloween look that Erin came up with! This would be a great compromise for me and my hubby, he loves to decorate for Halloween…I’m more into everything Fall! (Also am in love with her front door!!!)


Vintage Home Love

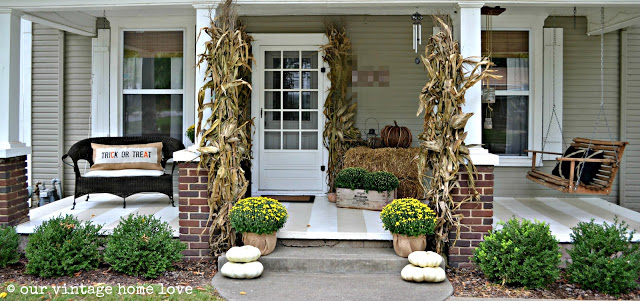
I really like the mix of old crates and burlap wrapped pots she used for her mums. AND the striped porch floor!!! I know it isn’t just for fall, but I LOVE it!!


Liz Marie Blog

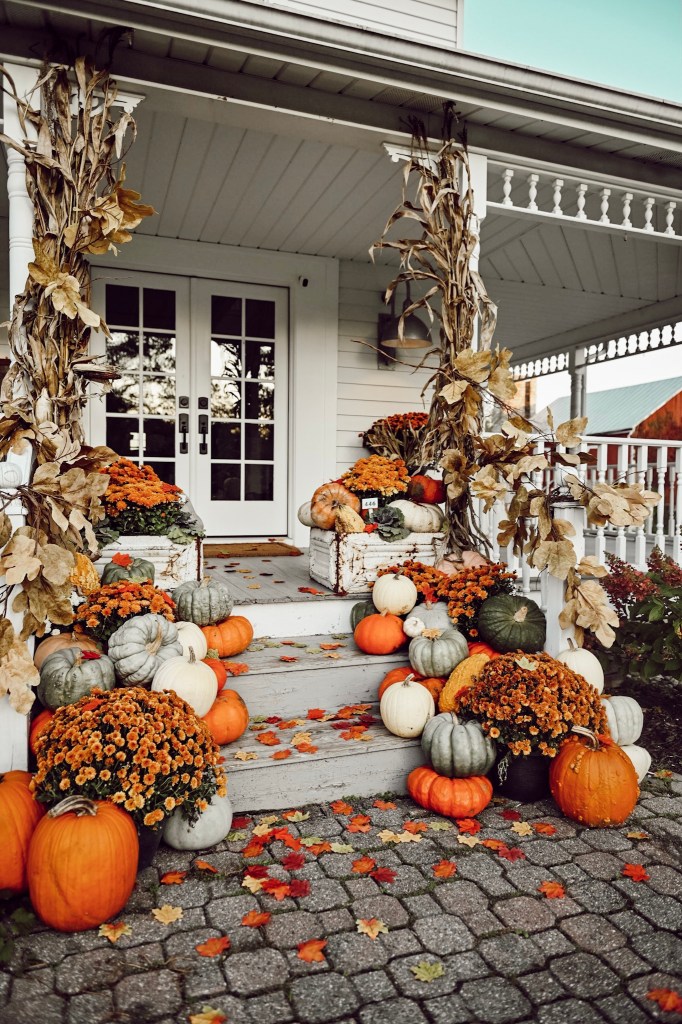
Pumpkins, pumpkins and more pumpkins! What’s not to love about this front porch? I am really liking the boxes she used at the top of the stairs as well, what a great find and perfect for front porch decor!!


Taryn Whiteaker

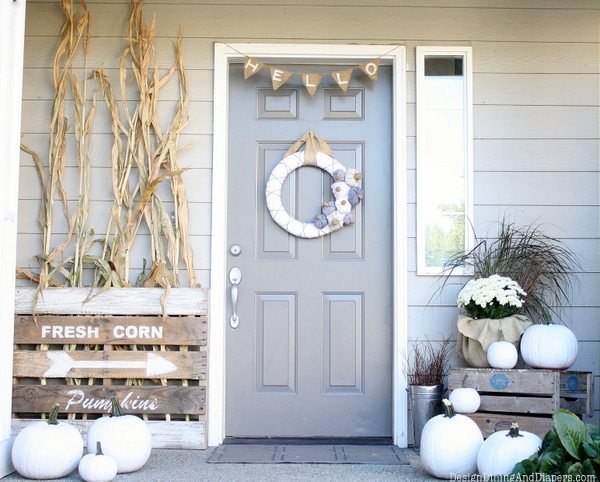
The neutral color palette of Taryn’s porch is such a change from all the oranges, golds and reds of fall, but I really love what she did with it! The wreath she made for the front door and the pallet sign are simply adorable and I love the color of her front door!


Hope you have found some inspiration for your Fall front porch and hopefully I can get my butt in gear and get mine decorated before it’s time to break out the Christmas decor! Follow me on Pinterest to see more inspiration for your home!

Crafts

Monogrammed Pumpkin

Who doesn’t love fall? Beautiful weather, the leaves changing colors, bonfires, wearing jeans & sweaters and of course pumkins! I don’t even drink pumpkin spice lattes and I love it! I decided to do a little fall craft to get a jump on my front porch decorating this year since I have a nice covered front porch now.

I have a Cricut, but if you have artistic ability (which I don’t), you could paint your pumpkin. I took the easy way out and did vinyl. The pumpkin is a 9 inch craft pumpkin from Michaels, I found mine on sale for $8 (regular price $20). I purchased 2 sheets of 651 vinyl (also from Michaels) in Navy and Gold. I had the ribbon on hand, it was in the clearance section at Hobby Lobby and I can’t pass up on clearance, burlap or ribbons, so all 3 combined and it was a definite purchase!

Craft pumpkin and 651 vinyl from Michaels

I cut my big T first, I went with 6 inches tall and used Mellow Soldier font which came in a free font bundle on thehungryjpeg.com. I wish I would have chosen a font with a straight bottom on the T, this font angles it so I feel like in some of my pics it looks crooked, I’m a little too critical sometimes. When applying to the pumpkin I tried to choose the side that was flatter than the others so it would be less likely to bubble or wrinkle.

Next step was the Thomas. I will confess the longest part of most of my Cricut projects is deciding on a font. I didn’t have any I was really in love with, so I went and found some new ones to pick from, which added to the length of time I spent on this project. For some reason the letter T just isn’t pretty in all fonts, some it looks like an F, others it looks like a J…it’s the too critical side of me again. So after checking out fontbundles.net and many free fonts later I found the Christina font. I made this 6 inches wide and about an inch and a half tall.

When applying the Thomas I would love to say that I have a perfect way to put it on, but in all honesty I had to cut it twice because the first one I thought looked crooked and it got ripped when trying to adjust it. I usually just eyeball these things, no real good way to measure an uneven pumpkin surface. I started by finding the middle of Thomas and I put that section on first and worked to one side and then the other. It may not be completely straight but it’s pretty close!

Last but certainly not least it needed a little something extra. Bows make everything complete! I went with the burlap ribbon with gold polka dots to tie in my gold lettering. To make the bow I followed a diy from Mommy Suite. I adjusted the measurements for my bow to better match the size of my pumpkin. I cut 2-12 inch long lengths, one 9 inch long and a 3 inch long piece for the center. It is a pretty easy bow to make and honestly would probably be easier in the bigger size and with a wider ribbon…it would also help if I didn’t burn my fingers on the hot glue! Once the bow was complete I simply hot glued it to the top of the pumpkin and ta da!

This morning my cute pumpkin got to be added to the front porch bench where she will have to patiently await her fellow fall decorations…will show you the finished porch…hopefully before Christmas!

These are super fun to make and are a great fall gift!